Use this easy-to-follow recipe for cooking up all sorts of infused goodies to enjoy medically or recreationally.
Supplies and Ingredients:
- Oven safe baking sheet or dish (8×8 will work fine for this recipe)
- 2 cups of butter
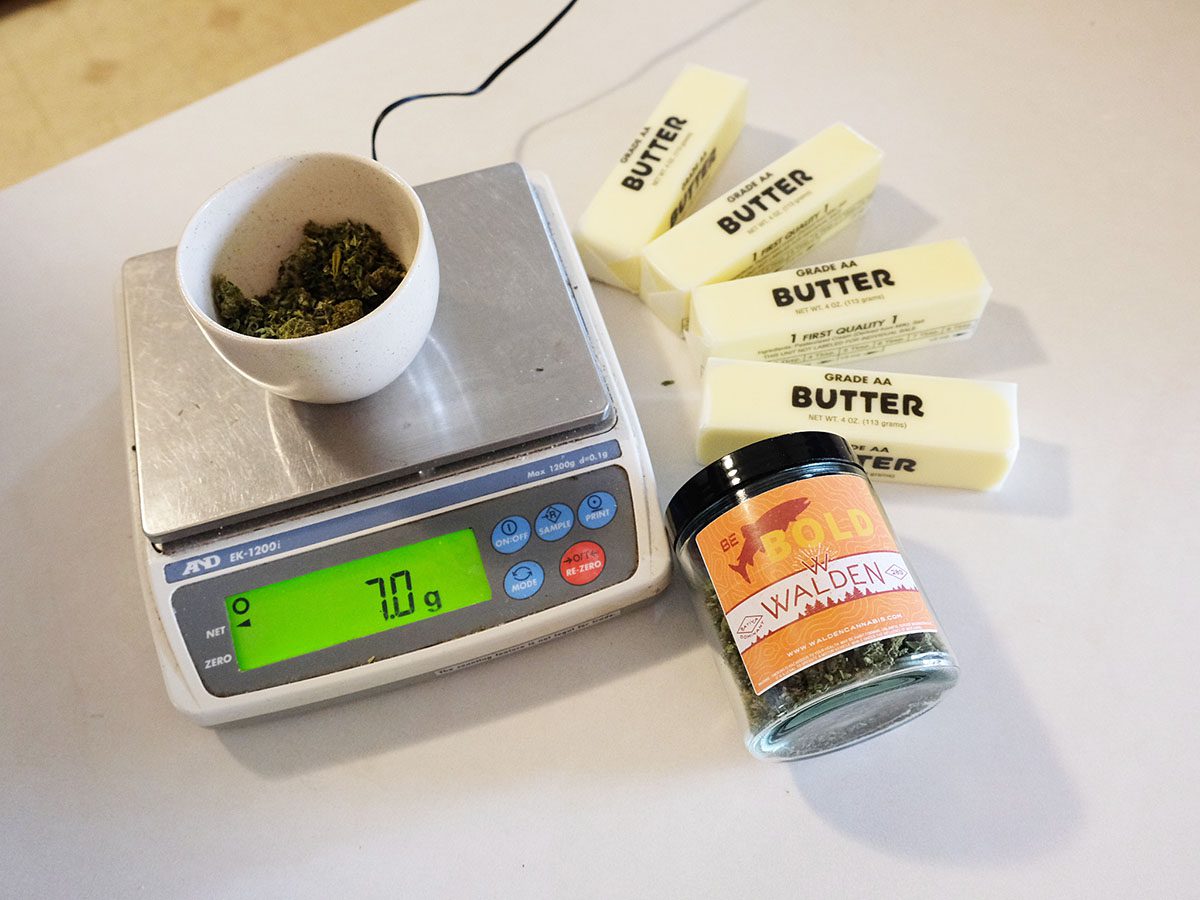
- 7g cannabis
- Crockpot
- Mason jar
- Grinder (if you prefer)
- Cheesecloth
- Mesh strainer (optional, but helpful)
- Bowl
- Container for storage
Step 1: Measure and Prep
To get started, measure out 7g of your preferred flower and 2 cups of butter.
Tip: Since trim and b-buds (also often called popcorn nugs or bb buds) are less desirable for smoking and therefore less expensive than top-quality flower, both make great material for infusing butter for your baked goods! Check out our online menu or ask a budtender about what trim or bb buds are available.
Step 2: Decarboxylate
Preheat your oven to 215 degrees and prepare your cannabis by grinding the whole quarter of weed. A coffee or herb grinder works surprisingly well here — pulse a few times, but don’t go wild — the idea is to break it down, not turn it into a powder.
Spread your freshly ground cannabis out evenly onto a baking sheet. The next step is to jump start activating the cannabis through a process called decarboxylation by baking it at 215 degrees for 45 minutes.
What the heck is decarboxylation, and do I really have to do it?
Decarboxylation refers to removing the carboxylic group of atoms from an organic compound. In this case, the organic compound we’re dealing with is THCA. The decarboxylated form of THCA is THC, and THC is responsible for producing that oh-so-desirable high. When we smoke cannabis, the heat from our lighter decarboxylates (aka activates) the THC in the smoke we inhale. For baking, we’ll use lower heat for this process.
If you’re concerned about the potential weedy aromas that might fill your apartment, you could skip the whole decarbing process in this recipe, but you’ll need to add an extra 3 hours to the Crockpot time, and you may end up with a “greener” tasting butter.
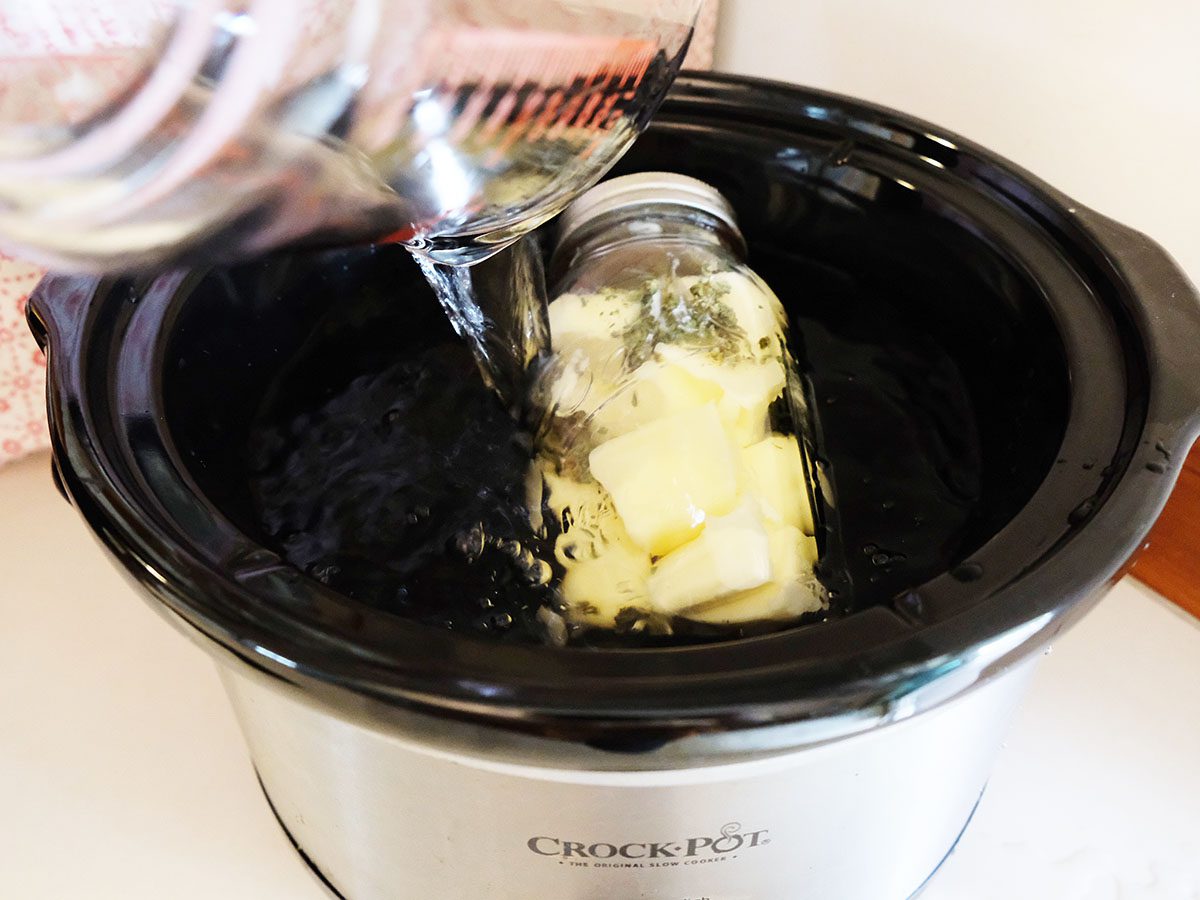
Step 3: Slow Cook in a Crockpot
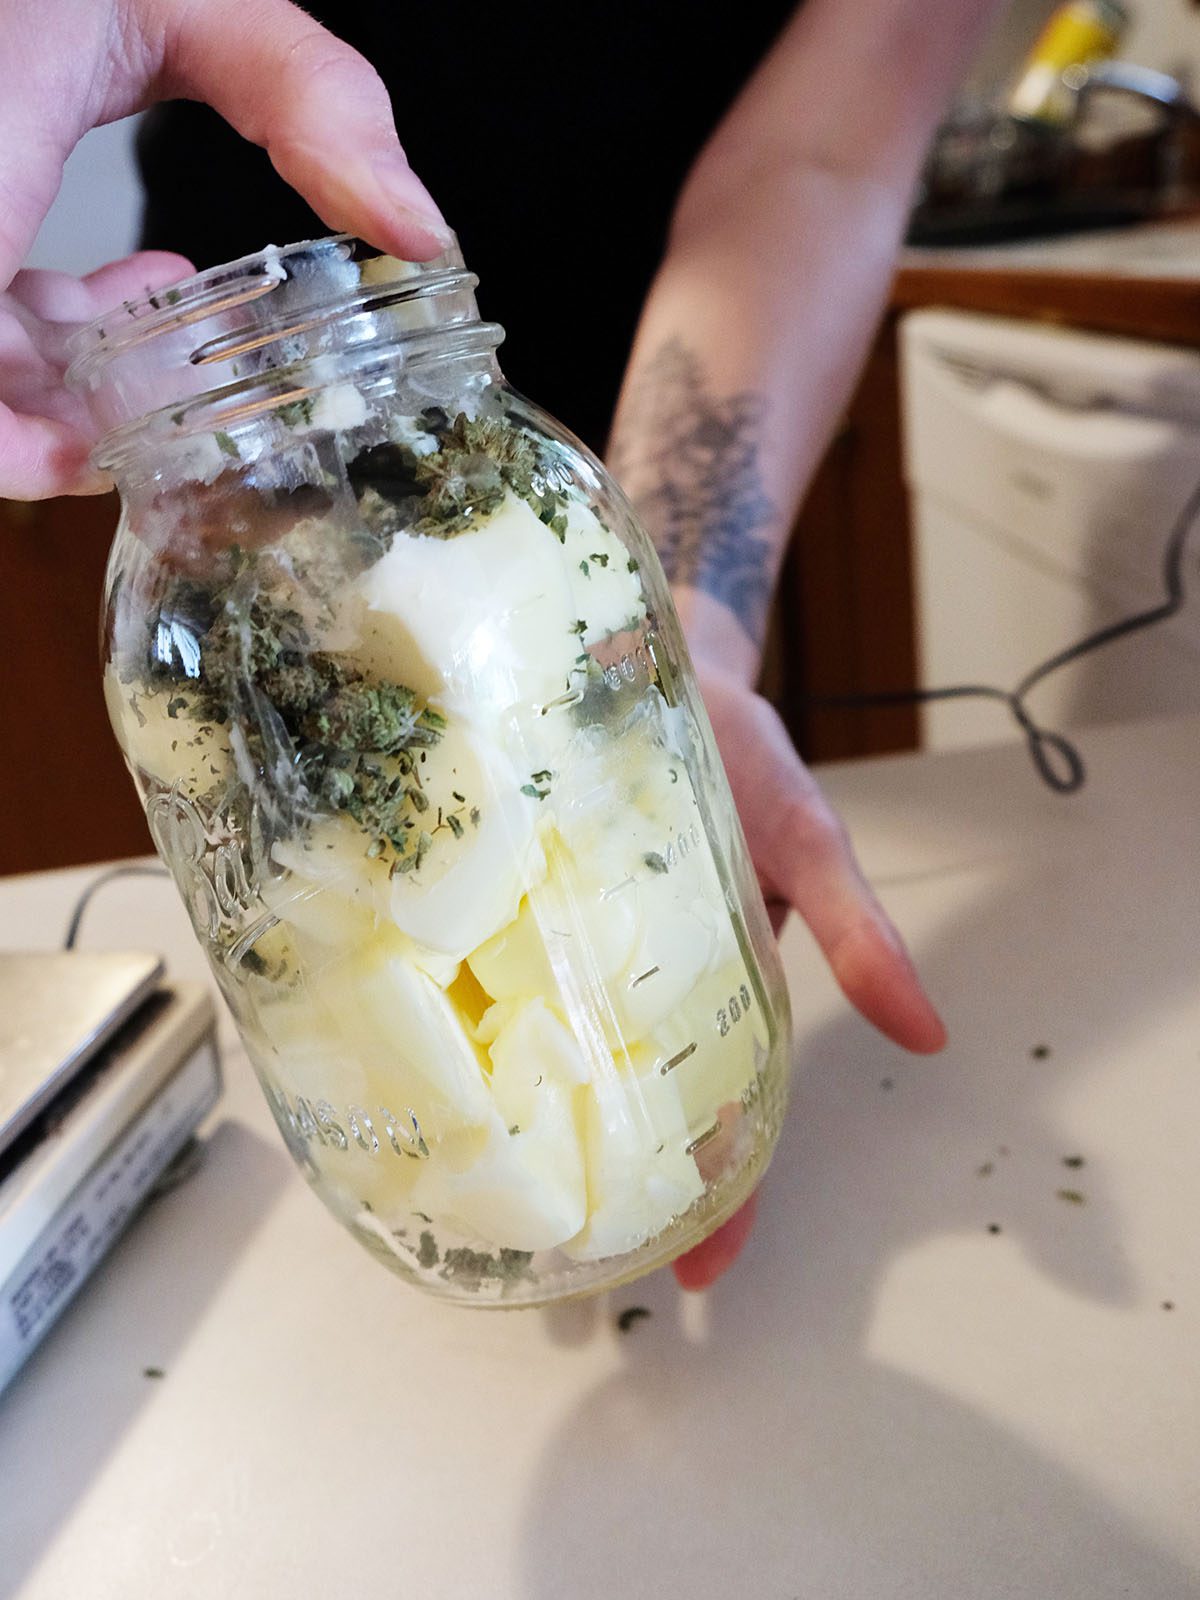
After your weed is decarboxylated (or decarbed for short) Combine both the flower and butter in a large jar with a tight-fitting lid.
Place your jar in a crock pot and fill with water so that your container is suspended. Let the cannabis and butter sit for 5 hours.
Did those hours fly by?
Step 4: Strain The Plant Matter
Now you’ll use your cheesecloth and a bowl to strain your newly infused cannabutter.
Get a buddy to help you hold the cheesecloth over the bowl. If you don’t have a buddy available, then a mesh strainer is helpful to support underneath the cheesecloth. Pour your mixture through to separate the plant parts from the oil.

After allowing the oil to cool until it’s comfortable to touch, squeeze any remaining oil out of the cheesecloth into your bowl. At this point, you’ve extracted all the goodies from the captured plant matter, so it’s best to compost it.
Step 5: Store it and/or Use it
Transfer the liquid gold (er, green) cannabutter to a storage container and once it’s totally cooled, stick it in the fridge (or freezer) to increase the shelf life. It will keep in the fridge for a few weeks, or the freezer for a few months. Now you can easily infuse your own recipes or salves!
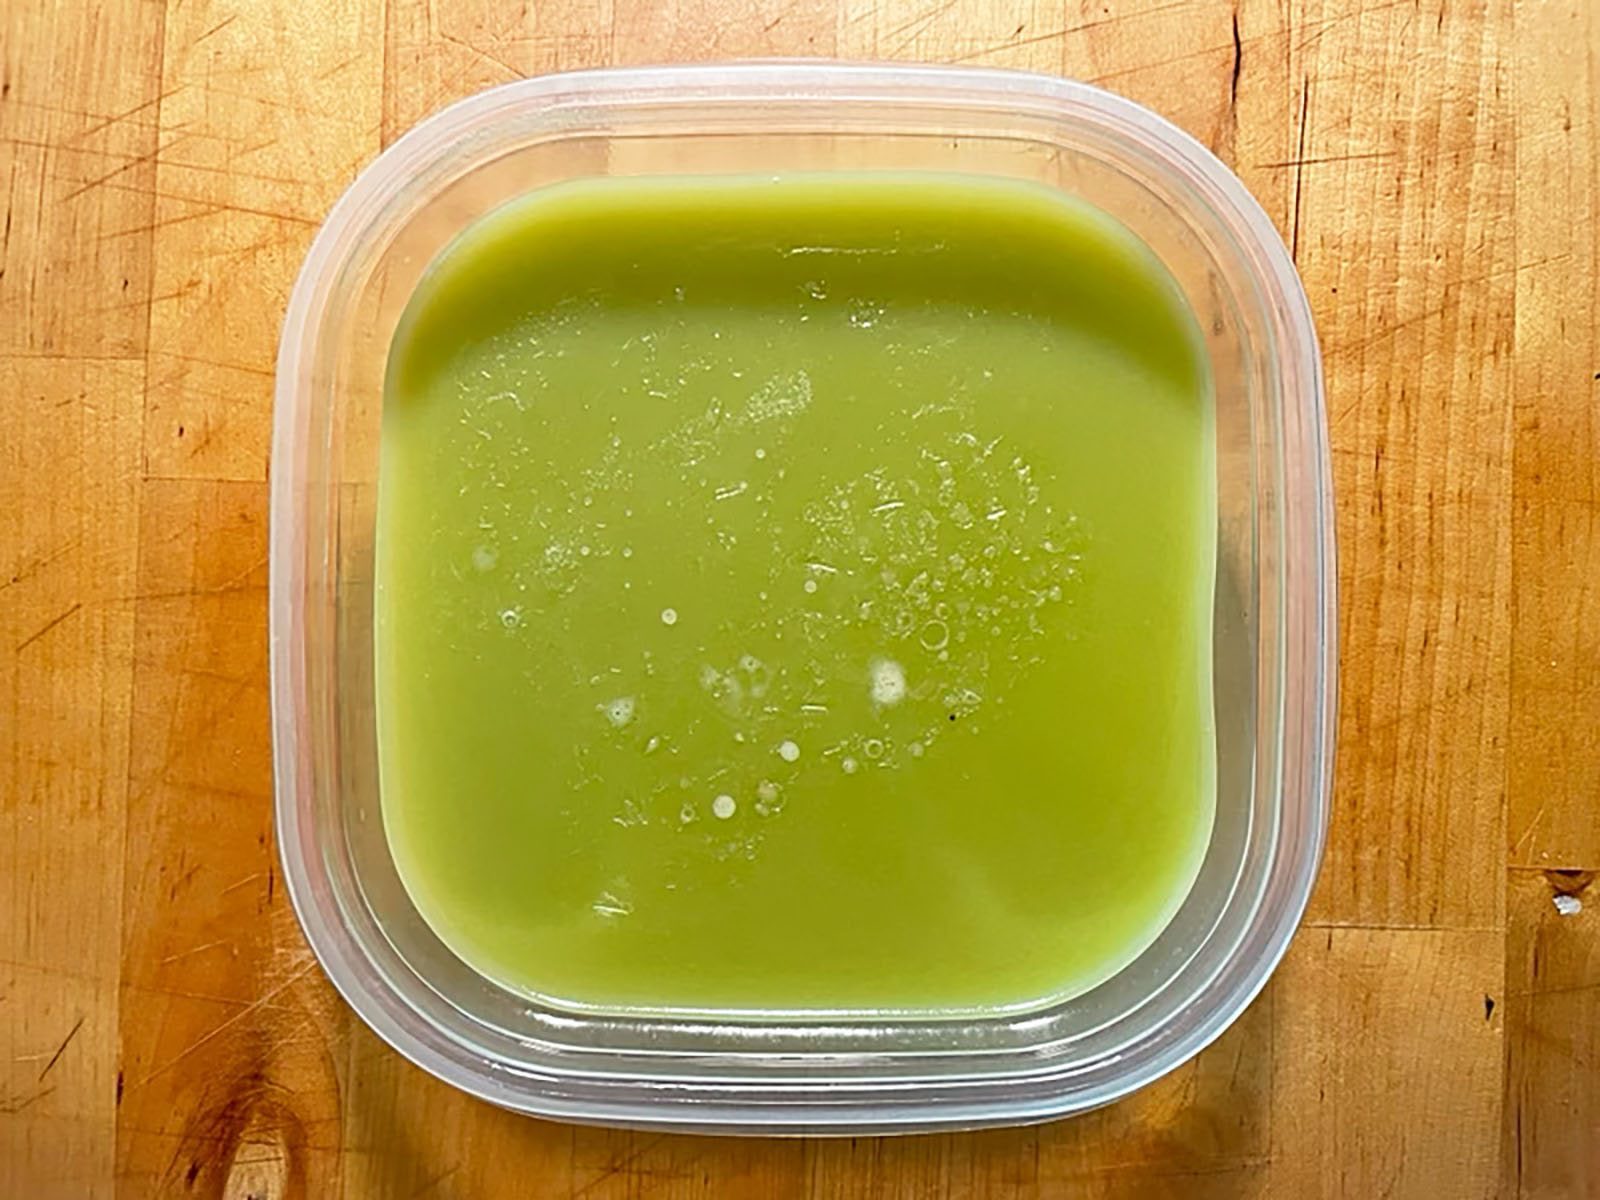
Isn’t it beautiful!?
Our favorite uses for Cannabutter:
Don’t have a Crockpot? Infuse your butter with just your oven — watch this video to learn how.